
Hellllllo, tall, dark and velvety….where have you been all my life, gorgeous? Come on in and stay a while.
Lord help me. I tried to come up with a sassy, snappy title for this post, but I just couldn't. Because nothing says it as well as "Coffee-Chocolate Layer Cake with Mocha-Mascarpone Frosting". I mean, really, just look at that cake, and then look at its name….”Coffee”…”Chocolate”…”Mocha”...”Mascarpone”…is that a lovely little symphony of lusciousness or what?
In the great debate over dessert, custard or ice cream, pie or cake, I fall firmly into the cake camp. Pie just doesn’t float my boat the way gooey, velvety goodies do. And a beautiful, delicate layer cake, with creamy, silky frosting is just about the best of the best. And I’m not talkin’ about those serviceable, but mundane boxed mix cakes, (and never, EVER about frosting in a can) or those industrial sheet cakes from the MegaMarts. A homemade cake, with a light, tender crumb, and a rich, creamy butter cream frosting. Wow, that’s Heaven on Earth as far as I’m concerned.
And a treat that, until recently, I hadn’t been able to achieve in the little kitchen. It’s all about that pesky patience thing, and learning to work methodically and carefully, and taking your time with the ingredients and the process. I’d tried “scratch” cakes before, and never had success. They were tough, they didn’t rise evenly, the frosting was heavy and greasy, they were just…*not good*. Not hideous really, but not worth the effort, and not anything I was proud of. So I kept the “scratch” cake on the list of “Culinary Things I Really Can’t Do Well”.
Like bread. After all, “I’m not a baker”.
That didn’t keep me from ripping out recipes though, for cakes that sounded yummy (yes, my recipe clipping compulsion is a sickness. I fully expect to star in a reality show one day about recipe junkies). And for the past few months, I’d been thinking I really wanted to give the whole cake baking thing another go. After all, I had conquered bread, and biscuits, and even pie crusts. I had learned to not fear the flour. It was time to climb the Layer Cake Mountain.
So, let’s make this glorious example of the pastry arts, shall we?
Coffee-Chocolate Layer Cake
(Adapted from "Bon Appétit", April 2009)
10-12 servings
2C cake flour
2C cake flour
3/4C natural, unsweetened cocoa powder
1&1/2 tsp. baking soda
3/4 tsp. salt
3/4C (1&1/2 sticks), unsalted butter, room temperature
2C (packed) golden brown sugar
3 large eggs
1&1/2 tsp. vanilla extract
1C buttermilk
4 tsp. instant espresso powder, dissolved in 3/4C hot water (hot tap water is fine, no need to boil)
Assemble the ingredients, that’s cake flour, buttermilk, butter, brown sugar, eggs, baking soda, salt, vanilla, cocoa and instant espresso powder. That’ll make the cake. We’ll look at the frosting later.
Assemble the ingredients, that’s cake flour, buttermilk, butter, brown sugar, eggs, baking soda, salt, vanilla, cocoa and instant espresso powder. That’ll make the cake. We’ll look at the frosting later.

Butter and flour two, 9-inch cake pans, and then put a circle of parchment in the bottom of each. Preheat your oven to 325°F, and put a rack on the middle rung.

You can’t really tell that there’s parchment on the bottom of the pans, because my parchment is unbleached, and sort of a light-brownish color. But it’s there. And it needs to be.
Sift the cake flour, cocoa, baking soda and salt into a medium bowl. Once again, I’ve chosen a bowl and a sieve that are far, far too small for the jobs they needed to do. You’d think I’d have learned by now, but no, I’m doomed to make huge messes on my counter when I sift ingredients.

Put the butter into the bowl of your stand mixer, and beat until smooth. Then add the brown sugar, and beat until well blended. That’ll take about 2 minutes.
Here’s before…

…and after

Add eggs one at a time, beating well after each one. Mix in the vanilla, and you’ll have the start of a batter, which will look like this one:

Take your combined dry ingredients

And add them to the mixer in 3 additions, alternating with the buttermilk in 2 additions. Here’s the first portion of the dry stuff:

Then gradually add in the hot espresso mixture, beating until the batter is just smooth. Divide the batter between the two pans, and smooth out the tops.
This is the start of something good….

I didn't do such a good job of dividing evenly did ? Well, the training wheels are still on, what can I say? Put the pans into the oven on the middle shelf, and bake until the tester comes out clean, about 40 minutes. Cool the cakes in the pans on a rack for 15 minutes. Then, take a small, thin, sharp knife and run it around the edge of the pans to loosen the cakes. Invert the cakes onto the rack, remove the pans and then remove the parchment. Place another rack on top of the cakes, and invert again so that the top-side is up. (I found it easiest to use two racks for both flips, since the cake is quite delicate, I didn’t want it to tear.) Cool completely.
Time for frosting !!!
Mocha-Mascarpone Frosting
1/3C natural unsweetened cocoa powder
1 tblsp. instant espresso powder
1&1/2C chilled heavy whipping cream, divided use
1&1/3C sugar
2, 8-oz. containers chilled mascarpone cheese
Sift the cocoa powder into a large bowl, and add espresso powder. For the small amount of powder, of course I used my large sieve. OY ! (insert forehead smack here)

Bring 1 cup of cream just to a boil in a saucepan. Slowly pour the hot cream over the cocoa mixture, whisking until the cocoa dissolves. That'll be about 1 minute.

Add the remaining 1/2C cold cream and the sugar, stirring until the sugar dissolves.
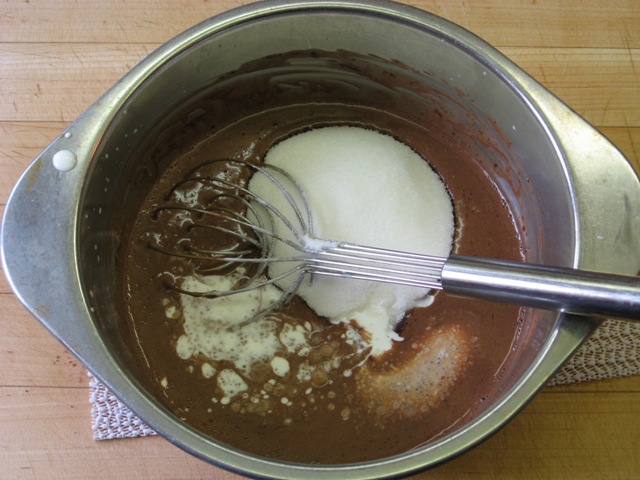
Ohhhhhhh, just let me drink this now.

But wait, it gets better.
Chill the cocoa/cream mixture until thoroughly chilled, at least 2 hours. When it’s cold, remove from fridge and add the mascarpone.
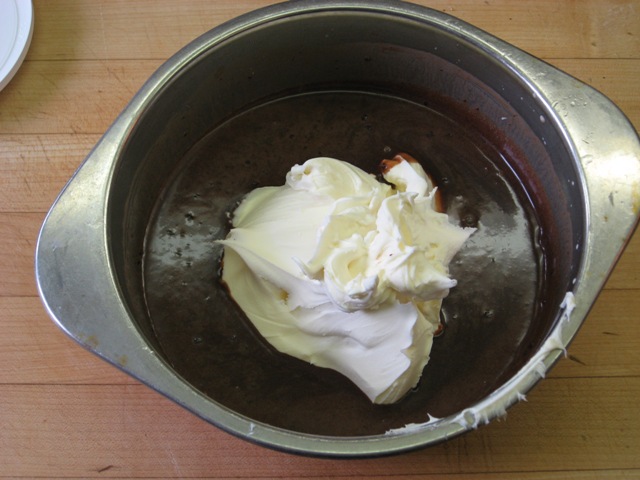
Beat the cocoa/cream/mascarpone mixture with an electric mixer on low until blended and smooth. Increase speed to medium-high, and beat until thick and fluffy, and medium-firm peaks form when beaters are lifted, about 2 minutes.
Ohhhhh, just kill me now…

Be careful not to take it too far, or the mixture will curdle. THAT would be a bummer, for sure.
Time to assemble ! (which leads shortly thereafter to time for eating….)
Using a pastry brush, gently brush any loose crumbs off of the layers. Take your time with this step; I didn’t do it quite as carefully as I should’ve and had some crumbs come through the frosting. It obviously tasted fine, but didn’t look as slick and spiffy as it could have.
Tear some wax paper into strips and line the edges of your cake plate with them. Center one of the layers over them, top-side up, so the wax paper extends out beyond the edge of the cake. This will keep your plate nice and neat and clean. Dollop (just love that word…..) about 1&3/4 cups of frosting over the top of the layer.

Using an offset spatula, spread to the edge of the layer. Top with the second layer, and press gently to adhere the layers together. Spread a thin layer of frosting over the top and sides of the cake, and stick in the fridge to chill for 10 minutes.
In process:

Use all of your will-power to keep from dipping your entire face into the bowl of remaining frosting, reminding yourself that you need it for the cake.
After the 10 minutes have passed, pull the cake out of the fridge, and using that offset spatula again, spread the rest of the frosting (that you haven’t shoveled directly into your mouth…) over the top and sides, swirling as decoratively as you can (me, not so much….hey, technically I’m a novice at this…).
Oh baby, oh baby, ohhhhhhhhhhhh BABY !

See all that schmutz on the wax paper? DIDN’T get on the plate, did it?
Top with chocolate curls, or, if you’re lucky like I was, use some of these little gems.


Pardon me, I think I just fainted again at the sight of that.
Store refrigerated (covered with a cake dome if you have one), and let stand at room temp for about 20 minutes before serving. I covered the cake, after it was cut, loosely with plastic wrap.
Yes, it tastes as exquisitely decadent as it looks !
One more off the culinary bucket list.
What is it that Charlotte wrote about Wilbur - "Some pig" I think?
ReplyDeleteWell I gotta say "Some cake!"
Remember on Golden Girls when they would all sit around eating ice cream I think- along those lines your cake in the middle of the table with a bunch of girlfriends and a pot of coffee = perfection