
One of the things I try, really, really hard to do with these articles is come up with snappy, witty and hopefully articulate headlines for them. The sort that will catch your interest, draw you into the article and make you want to read further.
Let’s just say I didn’t quite achieve that this time around. I tried. I’ve had an empty Word document up on the computer for most of the day, with the headline “SNAPPY TITLE FOR FOCACCIA POST”. Clearly, that train never left the station.
But hopefully the shot of the gorgeous, airy, lacy crumb of my focaccia will do what my pathetic attempt at a headline couldn’t; entice you to read on. Because this bread is really good. Really easy to make (no kneading ! No stand mixer !). And did I mention really good?
The recipe and the method come from the October 2010 issue of “Cook’s Illustrated”. I’ll give it to you pretty much verbatim at the end of the article, because I don’t think I made many (if any) changes to it. It was the easiest (and tastiest) focaccia I’ve ever made, and it was outstanding for a quick sandwich the next day. Not as good as when it was fresh, and warm from the oven, but still plenty tasty, and with that nice focaccia “snap” of the crust you expect.
Oh, and the flavor? Best I’ve made, possibly close to the best I’ve eaten. Certainly better than anything I’ve purchased in the MegaMarts, or even in most specialty stores. You’d have to go to a top-drawer Italian restaurant to get this quality focaccia.
So. About “Cook’s Illustrated”. I have a love/hate relationship with “Cook’s Illustrated”.
When I was first getting my cooking feet under me, trying to move from “gee, I think I like this cooking thing, where’s that can of cream of mushroom soup?” to “gee, I LOVE this cooking thing, how do I make pate a choux?” I worshipped at the alter of “Cook’s Illustrated”. I have all the issues from 1996 through October 2009 stashed away in a cupboard in my kitchen, along with half of 1995 and another random scattering of issues since 2009 that I’ve picked up on the newsstand. Obviously, I was a long-term subscriber (obviously), and I learned a lot from them. A lot. A ton, actually. As an avowed science geek (although my degree is in a liberal arts field, I spent my working life working for scientific firms and with scientists), I appreciated “CI’s” methodical, science driven approach to making the best dish. Much for the same reason, I am a HUGE fan of Alton Brown and “Good Eats”. (Let’s all take a moment and shed a tear for the cancellation of “Good Eats” from the miasma that is now the Food Network ….)
But somewhere, somehow, around the time I decided to let my subscription lapse, the wheels fell off at “CI”. Maybe I outgrew them. Maybe I got tired of their really tacky, classless marketing ploys (renew now, get a book ! Oh, yeah we bill you for the book in a couple of months, sorry, didn’t you see that 0.0005 point print on the bottom of the invoice? AND, we keep sending you invoices, and to collection agencies, even after you've RETURNED the book, postage paid, by, guess who.....YOU !). Maybe I got tired of not being able to access content *I’D PAID FOR* via my subscription, on their website, without another registration (which opened me up to more tacky, ceaseless marketing e-mails) or another paid subscription to the site. Maybe they became a little pretentious and full of themselves. Or maybe they just started really scraping the bottom of the barrel for recipes to tear apart and reengineer. Maybe it was all of the above. Probably it was all of the above. Like many intense relationships, it changed….we, “CI” and I, moved apart…..
Sorry…..I hadn’t intended this to be an anti-“Cook’s Illustrated” rant. I’ll go get another glass of wine and climb down off my high horse. PHEW…..that’s better….As I said, I still look at each issue on the newsstand, and buy those I find interesting or helpful. That’s probably 3 or 4 a year. And I still watch their PBS programs religiously. I admire them, I just don’t require them as I did 15 years ago.
This issue, the October 2010, is clearly one I bought on the newsstand because it spoke to me. I remember being especially charmed by this recipe for focaccia. So let’s cut the editorializing about philosophy of the magazine, shall we, and just make the damn bread !
You start with a biga. We’ve talked about bigas (sometimes known as a poolish or a starter or a pre-ferment) before. Bigas/poolishes/starters/pre-ferments are mixtures of flour, water and yeast that are allowed to ferment and develop for at least several hours, preferably overnight, and up to several days under refrigeration. While the biga is fermenting, flavor and carbon dioxide are developing. The carbon dioxide will help give us those lacy, airy holes in the crumb we’re lookin’ for.
There’s no line-up of players this time around. It’s pretty darned standard. You’ll need all-purpose flour, water, yeast, olive oil, kosher salt and fresh rosemary leaves. Done and done.
The day before you want to make your focaccia, start your biga. Mix together a small amount of flour, warm water and yeast in a nice large bowl (make sure it’s large enough to hold the entire batch of dough….you won’t mix in a mixer for this version), using a wooden spoon.
It’ll be pretty runny at first, you’ll be working with 100% hydration here (equal parts water and flour, *mental note* loose, sloppy doughs equal light, airy crumbs).

You want to make sure all the flour is incorporated, and no dry patches remain. When you’ve got that, cover it up with plastic wrap, and let it sit on the counter for at least 8 hours, preferably overnight. You can stash it in the fridge for up to 3 days; just pull it half an hour before you want to use it.

Hard to see from the glare off the plastic wrap, but after only about half-an-hour, there was already lovely bubbles developing. Gotta love da yeastie bugs !

And here are the bubblies the next morning when it was time to start making the focaccia. That’s the sign of gooooooood stuff happening.

Weigh out more flour

and more water.

Yes weigh. More precise. Depending upon the weather, your flour’s weight will change because of the humidity level around you. Measured by volume, a cup of flour could weigh significantly more (or less) depending upon the humidity level. Weight gives you the most consistent results. 12-and-a-half-ounces of flour (needed for this recipe) will ALWAYS weigh 12-and-a-half-ounces, regardless of whether that would equal 2&1/2 cups or 2&5/8 cups. Get a scale ! But….don’t run away from recipes that are written with volumetric measures. Just be prepared to adjust with more water/flour if the dough doesn’t look right.
Damn, but I'm preachy today, aren't I ? Must be time for more wine...
Dump the flour and water, along with more yeast, in on top of the biga.

Mix that in with your wooden spoon again until it’s all incorporated, and there are no dry spots. Cover again with plastic wrap, and let sit for about 15 minutes at room temperature. At that point, sprinkle over some salt, and stir that down into the dough. Cover that baby up again, and let it sit at room temp for about half an hour.
POOOOOF ! It rosed !

Take your handy-dandy bowl scraper (remember this…..?)

and spritz it down with some nonstick spray. You could also use a large rubber spatula, but I think the bowl scraper makes it easier, and the dough more manageable.
Then, you’re gunna take the bowl scraper, and slide it down one side of the bowl, lift the dough, and fold it over onto itself.

Rotate the bowl 90 degrees, and repeat. And again, and again, and again, for a total of 8 turns and folds.
Cover the dough up, let it sit for 30 minutes.
Repeat two more times. So, you’ll have a 30 minute rise, turn and fold, 30 minute rise, turn and fold, 30 minute rise, turn and fold.
You may (actually you do) want to spray the underside of the plastic wrap with more of the nonstick spray. The dough will eventually get bubbly and big enough to meet the film, and it will stick. Again, this is a very wet, slack dough.
While you’re on your last 30-minute rise, start preheating your oven (and your baking stone) to 500°F. You want to place a rack in the upper-middle and put the stone on that rack. Give the oven at least a 30 minute preheat.
Gently move the dough from the bowl to a lightly floured board. Lightly dust the top with more flour (no pics, gloppy hands).
Divide the dough into two equal pieces.

I didn’t weigh these, I could barely move them, they were so wet. I think…..she says, smacking her head with her palm, that I let it rise one too many times (all together now, and in unison, read the recipe, Roberta). In retrospect, I’m pretty sure I did 3 turn/folds and FOUR rises. Oooooopsie. But as you will see, it still came out fine. Again, I say, *most* kitchen muck-ups are not fatal. Carry on then, as though I was doing this correctly.
So, assuming YOU follow the instructions correctly, you *should* be able to form the halves into disks about 5-inches in diameter by tucking the edges under the dough blob. *I* had no such luck, because as we’ve established, I’m an air-head, and my dough was too soft.
So I just skipped on to the next step, which was to oil a couple of 9-inch cake pans, and then sprinkle a goodly amount of kosher salt over the oil.
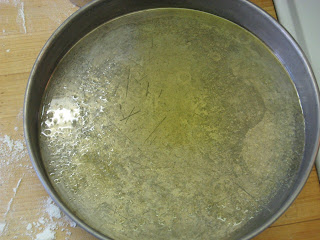
You also want a goodly amount of oil in the bottom of the pan. The dough essentially “fries” in the oil as it bakes, giving it that characteristic, crunchy, crusty bottom.
Then take your nicely, properly shaped dough rounds, and plop them into the oiled cake pans.

Or, take your misshapen, awkward dough amoebas and plop THEM into the oiled cake pans. They *WILL* shape out correctly, for the most part in a bit, so if you end up with amoebas, don’t be discouraged.
Move the amoebas/rounds around in the pan to get them covered with oil, then gently pick them up and flip them over, so they’re oiled on both sides. Cover up with more plastic wrap, and let rest for 5 minutes.
It’ll puff up a bit more…

…then using your fingertips, press the dough gently out to the edges of the pan (or as close as you can get it). Again, because my dough had risen one too many times, it was a bit more recalcitrant than it should’ve been. But you can always walk away from recalcitrant dough, let it come to its senses and continue. But even with surly dough, I still got pretty close.

After you’ve got it shaped, take a dinner fork and stab that bad boy all over. That will keep it from bubbling out of control.

You should especially try to burst any large bubbles (ahhhhhhh, the story of my life, having all my large bubbles burst, but I digress).
Once you’ve docked the dough (ewwww, ahhhh, fancy culinary term alert), take some of this

and mince it up. Sprinkle that evenly over the tops of the dough and let it rest again, for about 5 or 10 minutes (no need to cover this time).

Slide your pans into the inferno that is now your oven, placing them as much as possible on the screamin’ hot stone. My stone’s pretty small, so about 1/4 of each of the pans hung over the edge. Not to worry, half-way through the 28 minute bake time (that’s 14 minutes for us math-impaired individuals), you’re going to swap positions of the pans, so the edge that was hangin’ off the stone will now be on it.
After the full 28 minutes, you’ll have this:

Times two, actually, which you will then let cool on a rack, in the pan, for about 5 minutes. Then you will use a very thin, flexible spatula, and remove the loaves from the pan. Put the loaves on the rack, and let sit for 30 minutes before digging in.
Here’s the full-blown, non-snarky “Cook’s Illustrated” recipe.
Rosemary Focaccia
“Cook’s Illustrated” September/October 2010
Makes two, 9-inch round loaves
BIGA
1/2 cup (2&1/2 ounces) unbleached, all-purpose flour
1/2 cup (2&2/3 ounces) warm water (100-110°F)
1/4 teaspoon instant or rapid-rise yeast
DOUGH
2&1/2 cups (12&1/2 ounces) unbleached, all-purpose flour
1&1/4 cups (10 ounces) warm water (100-110°F)
1 teaspoon instant or rapid-rise yeast
3 teaspoons kosher salt (divided use)
4 tablespoons extra-virgin olive oil
2 tablespoons minced fresh rosemary leaves
FOR THE BIGA: Combine flour, water and yeast in large bowl and stir with wooden spoon until uniform mass forms and no dry flour remains, about 1 minute. Cover bowl tightly with plastic wrap and let stand at room temperature overnight (at least 8 hours and up to 24 hours). Use immediately or store in refrigerator for up to 3 days (allow to stand at room temperature for 30 minutes before proceeding with recipe).
FOR THE DOUGH: Stir water, flour and yeast into the biga with wooden spoon until uniform mass forms and no dry flour remains, about 1 minute. Cover with plastic wrap and let rise at room temperature for 15 minutes.
Sprinkle 2 teaspoons salt over dough, stir into dough until thoroughly incorporated, about 1 minute. Cover with plastic wrap and let rise at room temperature 30 minutes. Spray rubber spatula or bowl scraper with nonstick cooking spray; fold partially risen dough over itself by gently lifting and folding edge of dough toward middle. Turn bowl 90 degrees, fold again. Turn bowl and fold 6 more times (total of 8 turns). Cover with plastic wrap and let rise for 30 minutes. Repeat folding, turning and rising 2 more times, for a total of three 30-minute rises. Meanwhile, adjust oven rack to upper-middle position, place baking stone on rack, and heat oven to 500 degrees at least 30 minutes before baking.
Gently transfer dough to lightly floured counter. Lightly dust top of dough with flour and divide in half. Shape each piece of dough into 5-inch round by gently tucking under edges. Coat two 9-inch round cake pans with 2 tablespoons olive oil each. Sprinkle each pan with 1/2 teaspoon kosher salt. Place round of dough in pan, top side down, slide dough around in pan to coat bottom and sides, then flip over. Repeat with second piece of dough. Cover pans with plastic wrap and let rest for 5 minutes.
Using fingertips, press dough out toward edges of pan. If dough resists, let it relax for 5-10 minutes. Using dinner fork, poke surface of dough 25-30 times, popping any large bubbles. Sprinkle rosemary evenly over tops of dough. Let dough rest until slightly bubbly, 5-10 minutes.
Place pans on baking stone and reduce oven temperature to 450 degrees. Bake until tops are golden brown, 25-28 minutes, switching placement of pans halfway through baking. Transfer pans to wire rack, and let cool 5 minutes. Remove loaves from pans, and return to wire rack. Brush tops with any oil remaining in pan. Let cool 30 minutes before serving.
If it's bread (or made with yeast), the cool place to be is Yeastspotting !
No comments:
Post a Comment